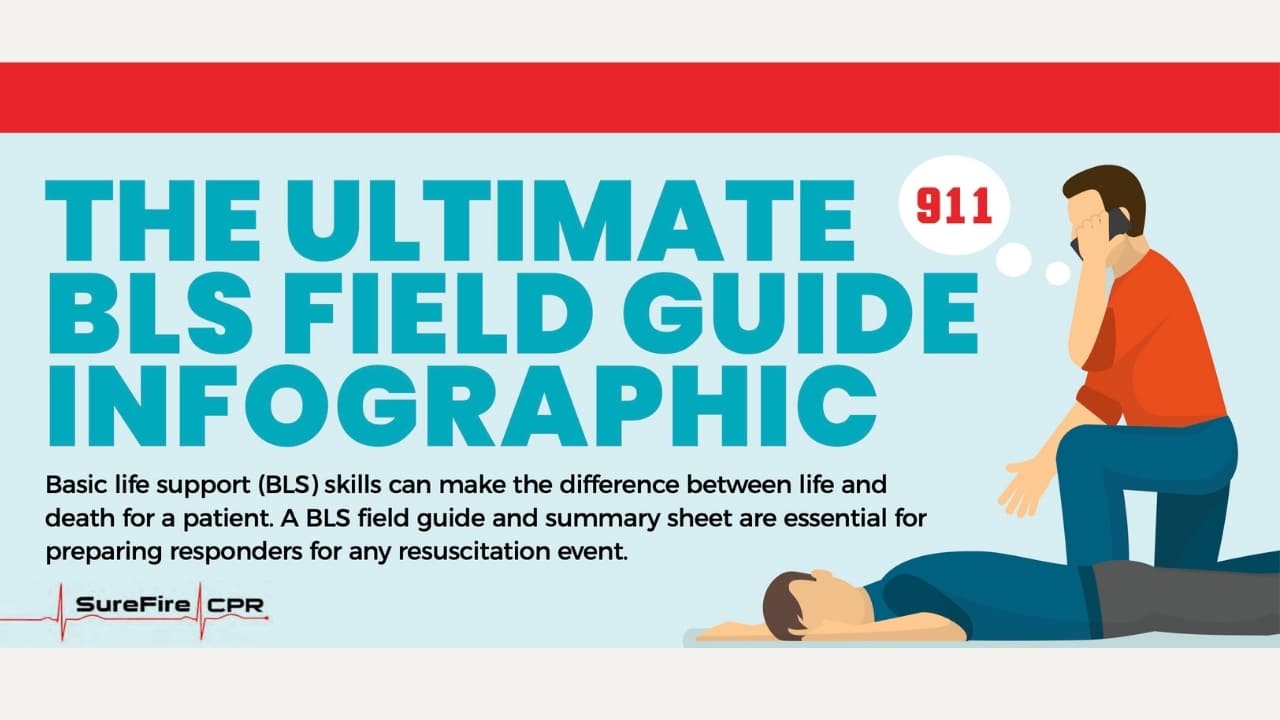
Introduction
Proper basic life support (BLS) skills are essential for any responder, often making the difference between life and death for a victim or patient. To ensure cardiopulmonary resuscitation efforts are successful, responders should be prepared to act both alone and as part of a high-performance team. All responders should remain up to date on BLS skills, using a BLS field guide like this one, to ensure they are prepared for a resuscitation event in any situation.
Chapter 1: Understanding Basic Life Support
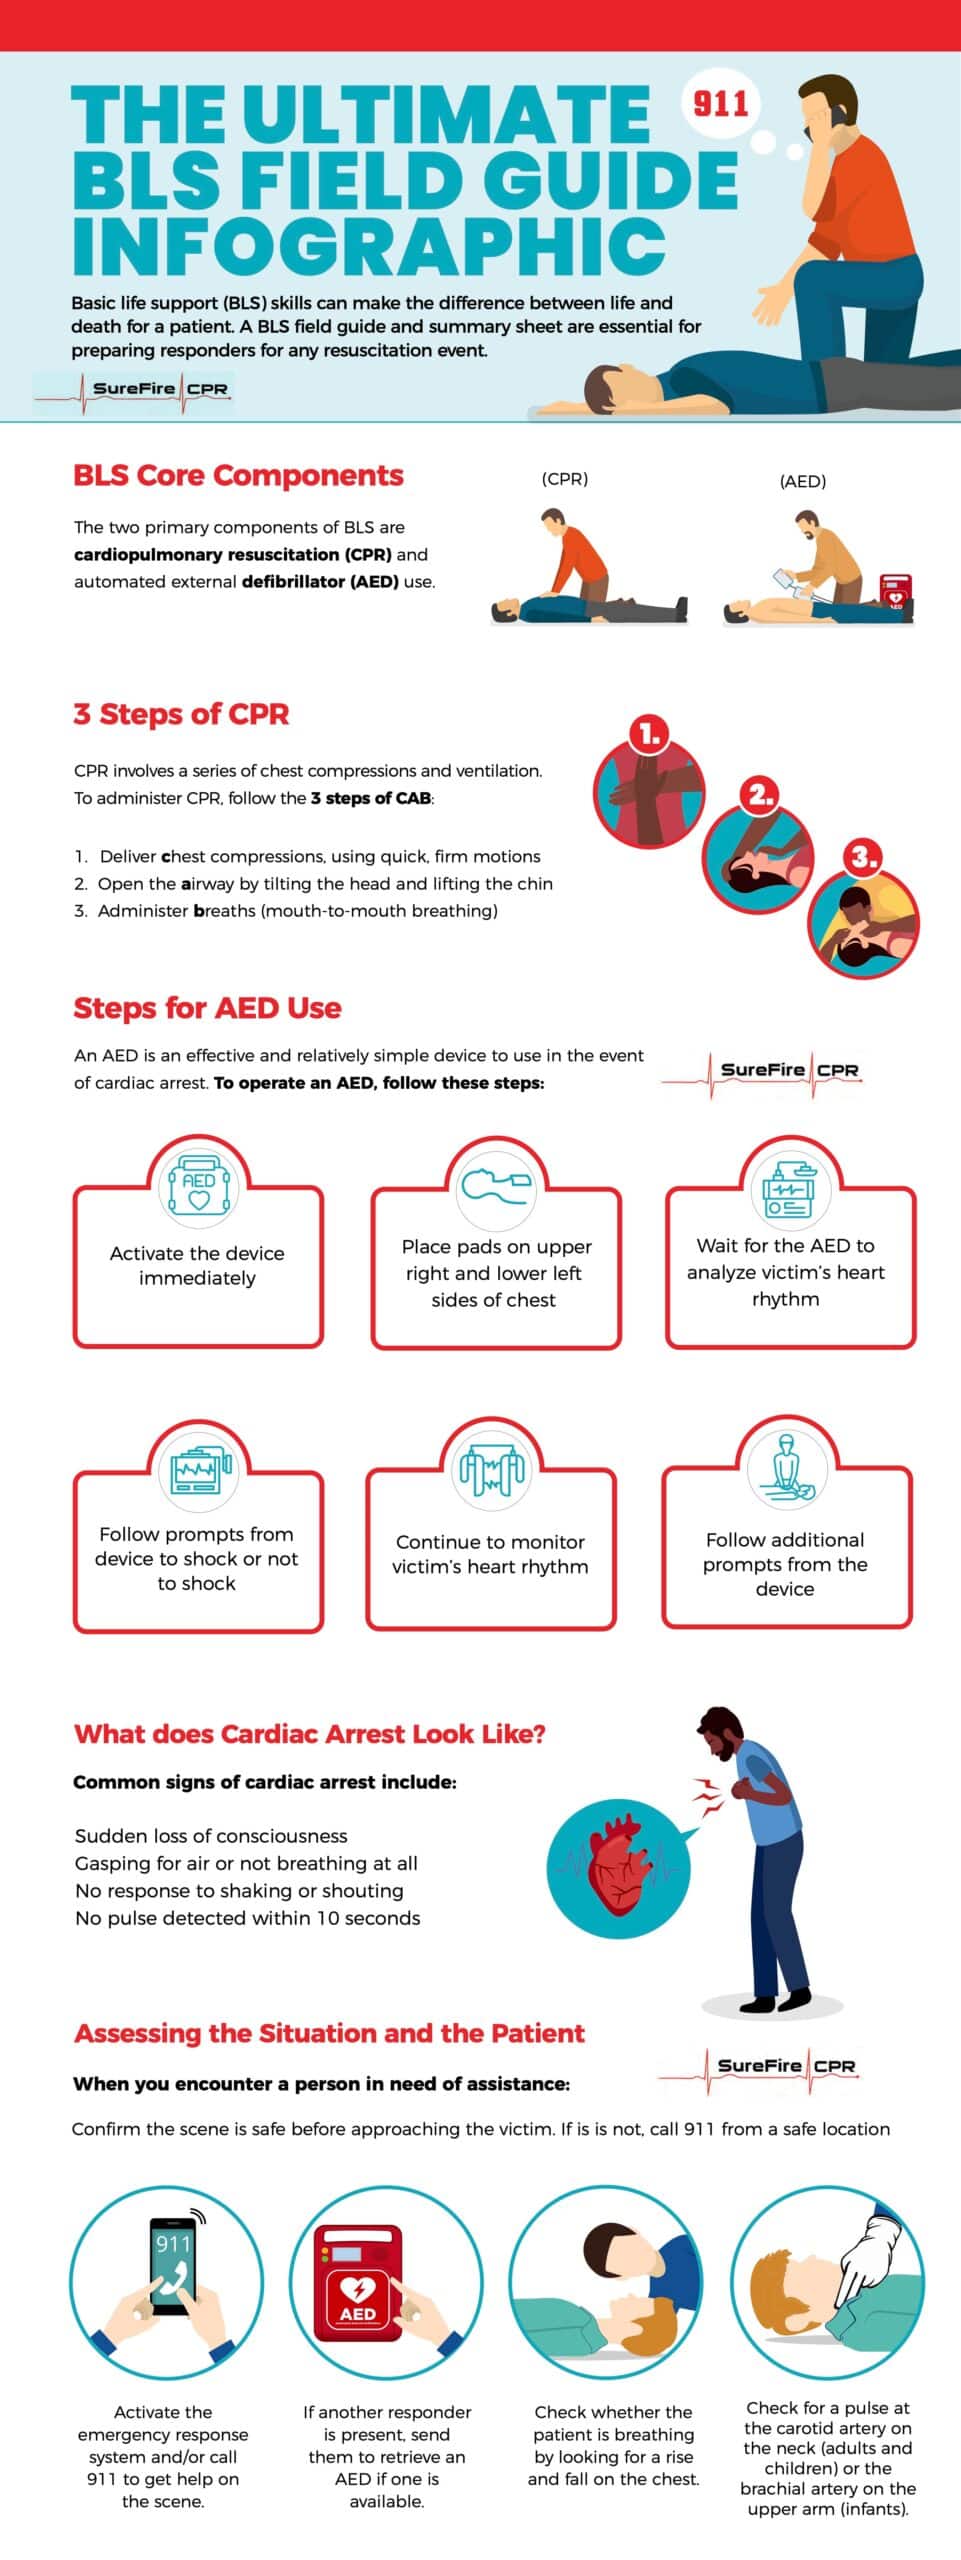
BLS encompasses medical care healthcare professionals use to treat patients with life-threatening conditions with a focus on cardiac arrest. The goal is to keep patients alive until more advanced medical care can be administered, such as during transport to a hospital.
CPR development began in the 18th century when mouth-to-mouth resuscitation became the method for reviving drowning victims. Chest compressions were also used throughout the 18th and 19th centuries to treat cardiac emergencies. CPR became official in 1960, and the American Heart Association (AHA) began training for physicians that became the forerunner for general CPR training.
Chapter 2: BLS Techniques and Procedures
The core components of BLS include CPR (cardiopulmonary resuscitation) and AED (automated external defibrillator) use.
BLS CPR steps include:
- Deliver chest compressions, using quick, firm motions
- Open the victim’s airway by tilting back the head and lifting up the chin
- Administer a series of breaths directly into the mouth (mouth-to-mouth breathing)
The specific method of CPR, including hand position, compression depth, and compression rate will depend on whether your victim is an adult, child or infant.
If an AED is available, it should be activated right away so you can perform a patient analysis as soon as possible. The pads should be placed according to manufacturer instructions, which usually means placing one pad on the upper right side of the chest and the other on the lower left, with about 1 inch of space between them.
The AED will then analyze the patient’s heart rhythm and prompt you on actions to take next. If the AED instructs you to deliver a shock, do so and then resume CPR immediately after. Reanalyze the defibrillator’s data after 5 CPR cycles. Only deliver a shock when the AED advises you to do so.
Chapter 3: Recognizing Cardiac Arrest and Other Emergencies
It’s critical to recognize what cardiac arrest looks like so you know when BLS CPR steps are needed. Common symptoms of cardiac arrest include:
- Sudden loss of consciousness
- Gasping for air or not breathing at all
- No response to shaking or shouting at them
- No pulse detected
Some patients also have warning signs of cardiac arrest days, or even weeks, beforehand. Symptoms might include:
- Extreme fatigue
- Shortness of breath
- Stomachache, nausea, or vomiting
- Back or chest pain
- Persistent dizziness or fainting
- Unusual heart palpitations (racing, skipping, etc.)
Choking and drowning are also occurrences where CPR may be necessary. If a patient is choking, they may display one or more of these signs:
- Clutching the throat
- A panicked or confused expression
- Noisy breathing (squeaky sounds)
- Inability to talk to you
- Cough, which could be forceful or weak
- Change of color in skin, lips or nails
- Loss of consciousness
Signs of drowning might look different than you may expect. A drowning victim might:
- Remain upright in the water without using their legs
- Keep head is low in water, possibly tilted back with mouth open
- Gasp for air or hyperventilate
Be unable to roll over on their back - Attempt to climb an invisible ladder
- Not make forward progress despite trying to swim
Before beginning BLS steps, it is crucial to assess the situation for safety and possible assistance. Once you have determined the area is safe, you can check the victim for responsiveness and call 9-1-1 if possible before administering CPR.
Chapter 4: Assessing the Patient
When you encounter a person who needs assistance, begin the assessment process immediately. Once you have determined the scene is safe, approach the victim, tap gently on the shoulder and shout, “Are you okay?”
If the person does not respond, open the airway quickly by tilting up the head and pulling the chin forward. Look to see if the victim is breathing by checking the chest for movement. You can also check the patient’s pulse, but do not do so for more than 10 seconds. At that point, you should initiate CPR if you cannot detect breathing or the breathing is abnormal, and you can’t find a pulse.
Call for emergency assistance immediately so help is on the way while you are beginning the resuscitation process. It is critical to get trained, fully-equipped professionals on the scene as quickly as possible. If you can, leave the phone on speaker so you can administer CPR while your line of communication remains open until help arrives.
Chapter 5: Performing CPR on Adults, Children, and Infants
BLS CPR steps vary based on the age and size of your patient. This BLS field guide includes BLS steps for adults, children, and infants.
Adult CPR Basic Life Support Steps
The adult BLS algorithm includes the following steps once the assessment process is complete:
If breathing is normal and you detect a pulse, monitor the victim until emergency responders arrive.
If breathing is absent or abnormal and you can detect a pulse within 10 seconds:
- Administer 1 rescue breath every 6 seconds or 10 breaths each minute
- Check pulse for no more than 10 seconds
- If opioid overdose is suspected, administer Naloxone as directed
If breathing is abnormal or absent and you cannot detect a pulse:
- Begin cycles of 30 compressions and 2 breaths
- Use AED as soon as possible, if one is available
- If AED is available and advises shock, give one shock and resume CPR
- Continue CPR for 2 minutes until AED prompts you to do a rhythm check
- If victim is nonshockable, resume CPR for 2 minutes
- Check AED to see if prompting has changed based on rhythm check
Adult CPR Specifics
- Use 2 hands on the sternum
- Compress at least 2 inches
Perform 30 compressions and 2 ventilations, whether 1 or 2 responders present - Compression rate should be 100-120 per minute or 30 compressions every 15-18 seconds
Pediatric CPR Basic Life Support Steps
The pediatric BLS algorithm includes the following steps once the assessment process is complete:
If breathing is normal and you detect a pulse, monitor the victim until emergency responders arrive.
If breathing is absent or abnormal and you can detect a pulse within 10 seconds:
- Administer 1 rescue breath every 2-3 seconds or 20-30 breaths each minute
- Check pulse every 2 minutes and initiate CPR if no pulse is detected
- If heart rate remains less than 60 beats per minute with signs of poor perfusion, begin CPR
- If heart rate stabilizes, continue rescue breathing and checking pulse every 2 minutes
- If no pulse is detected within 10 seconds, begin CPR
If breathing is abnormal or absent and you cannot detect a pulse:
- Activate emergency response system and retrieve an AED if victim suddenly collapses
- Begin cycles of 30 compressions and 2 breaths
- Use AED as soon as possible, if one is available
- If AED is available and advises shock, give one shock and resume CPR
- Continue CPR for 2 minutes until AED prompts you to do a rhythm check
- If victim is nonshockable, resume CPR for 2 minutes
- Check AED to see if prompting changes based on rhythm check
Child CPR Specifics
- 1-2 hands on sternum
- Compress ⅓ of the chest depth
- Perform 30 compressions and 2 ventilations if 1 responder
- Perform 15 compressions and 2 ventilations if 2 responders
- Compression rate should be 100-120 per minute or 30 compressions every 15-18 seconds
Infant CPR Specifics
- 2 fingers on sternum or use encircling method
- Compress ⅓ of the chest depth
- Perform 30 compressions and 2 ventilations if 1 responder
- Perform 15 compressions and 2 ventilations if 2 responders
- Compression rate should be 100-120 per minute or 30 compressions every 15-18 seconds
Neonate (Infants Up to 28 Days Old) CPR Specifics
- 2 fingers on sternum or use encircling method
- Compress ⅓ of the chest depth
- Perform 3 compressions and 1 ventilations, whether 1 or 2 responders present
- Compression rate should be 100-120 per minute or 30 compressions every 15-18 seconds
See CPR Ratio Chart and Key Numbers for reference.
Chapter 6: Using an Automated External Defibrillator (AED)
An automotive external defibrillator (AED) is an essential component to any BLS field guide. They are extremely effective for cardiac arrest and surprisingly easy to use, even if you are not a healthcare professional. These devices dramatically improve outcomes for cardiac arrest patients, but they must be used quickly. It is best to learn how an AED works before you actually need one.
Once you turn on an AED, it will begin providing prompts. Attach electrode pads to the victim by removing clothing from the victim’s chest and positioning the pads correctly. One pad goes on the upper right side of the victim’s chest, while the other goes on the lower left side.
AEDs are not appropriate for neonates. They should not be used near water or flammable materials. When in use, responders should remain clear of the patient during the heart rhythm analysis and when shocking the victim.
The AED requires 2 minutes to provide a rhythm check and a prompt for the responder. The device will let you know whether the victim is shockable or unshockable. If a shock is appropriate, make sure no one is touching the patient and call out, “Clear!” before administering the shock.
Following the shock, continue to deliver CPR for 2 minutes and check the AED again for a heart rhythm analysis and prompt for further treatment.
Chapter 7: Special Considerations and BLS Modifications
Thus far, this BLS field guide has provided basic BLS steps for adults, children and infants. There are special scenarios and situations where the steps may require some modification to enhance safety and efficacy.
Pregnant Women and Seniors
A pregnant woman in cardiac arrest is particularly vulnerable to oxygen deprivation since she is providing oxygen to both her body and the body of the fetus. When performing CPR, emphasis needs to be placed on airway management.
The victim’s abdomen should also be shifted to the victim’s left side to relieve pressure from the uterus on the abdominal aorta and inferior vena cava, and to preserve blood flow to the lower body. This also makes chest compressions more effective.
See our How to Perform CPR on a Pregnant Woman guide.
CPR becomes riskier in older patients, as the sheer force of the chest compressions can lead to internal trauma like broken ribs, airway damage, or internal bleeding. Some seniors choose to sign a DNR (do not resuscitate) order to prevent responders from performing CPR in the event of cardiac arrest. The victim may wear a DNR medical bracelet if this is the case.
BLS in Challenging Environments
Some situations make it challenging to administer BLS using all the steps provided in this BLS field guide. For example, standard CPR may be difficult or even impossible to perform in a confined space or when the victim is in water.
In a confined space that does not allow for standard CPR, over-the-head CPR may be effective. However, the depth of the compressions may be affected with this technique, so it should only be employed when standard CPR is impossible to perform.
CPR in water is not recommended. The best approach is to focus on removing the victim from the water first and then administering chest compression and ventilation once the victim is on a firm surface.
Infection Control and Personal Protective Equipment (PPE)
The risk of contamination while administering BLS steps is relatively small and can be alleviated with some simple steps like washing hands with soap and water and covering cuts or open injuries on your hands with dressings or waterproof gloves. If gloves aren’t available, you can also substitute with a plastic bag.
To lower infection risk when giving mouth-to-mouth, responders can wear eye protection and a face mask. An emergency face shield or pocket CPR mask is also an effective way of preventing transmission.
A PPE is any protective item of clothing or equipment designed to protect the responder from physical, chemical, or airborne hazards. PPEs may include gloves, a CPR mask, soap and water, or a waterless hand cleaner or sanitizer. A biohazard bag often accompanies PPE, and can be used to safely dispose of bodily fluids.
Chapter 8: BLS Certification and Training
BLS certification is recommended for many healthcare workers, including physicians, nurses, EMTs, paramedics, and other key medical personnel. It is also critical for dentists and pharmacists, who might encounter a cardiac arrest emergency during their course of work.
BLS certification is available through numerous facilities and organizations, but not all BLS courses may offer the same quality of training. Look for a program that focuses on participant engagement, ample practice time, and information retention. The course should also be accredited by the AHA or ARC.
Ongoing training and regular skill practice is also essential to keep knowledge and skills up to date. Certification is only valid for 2 years, so you will need to take refresher courses at least that frequently to maintain your credentials. SureFire CPR provides AHA Accredited programs.
Chapter 9: Conclusion and Additional Resources
BLS training is essential long before you find a need for these skills. Refresher courses are also critical to ensure skills and knowledge remain current. While a BLS field guide like this provides the basics of BLS, when you encounter a cardiac arrest event, time is of the essence. The quicker you can administer effective aid, the better your victim’s odds of survival will be.
FAQ’s
Can I perform BLS on someone I don't know or am not trained to help?
Yes, you can perform BLS on someone you don’t know. While it is possible to perform BLS without training or certification, we recommend getting the training so you are prepared if you encounter someone in need of assistance.
Are there any risks associated with performing BLS?
If you have assessed the safety of the environment before moving to the victim, the risks associated with performing BLS are relatively small. In most cases, the benefits of performing life-saving measures outweigh the risks to the responder or the patient.
Is BLS the same for adults, children, and infants?
The basic steps are the same for BLS in victims of all ages, but the details of each step differ somewhat. It is important to get training for victims of all ages so you know how to adjust your techniques to the patient.
What should I do if I'm alone and need to perform BLS on someone?
Follow the basic steps of assessing the environment and the victim before beginning chest compressions and clearing the airway. Then, follow the steps taught in your BLS training.
Can I use an AED on a person with a pacemaker or implantable cardioverter-defibrillator (ICD)?
Yes. The location of the AED pads should not interfere with a pacemaker or ICD.